Showing posts with label Appetizer. Show all posts

Wednesday, July 20, 2011

Goat Cheese and Ham Wrapped Asparagus


These Goat Cheese and Ham Wrapped Asparagus were a huge hit at Matilda's "Tea for 2" party.  And surprisingly it was the men who really gobbled these up!  They are a great finger food because they don't require a fork and are easy to pick up and eat while you socialize.

Serves 15-20
Ingredients:
2 lbs. fresh asparagus
1/2 lb. honey ham
8 oz. herb goat cheese
1/3 brick cream cheese, softened
30+ fresh chives 


Cut off the tough ends of the asparagus (approximately 1"- 2"). Cook asparagus.  Only cook for a few minutes in boiling water and then shock them in a large bowl of ice water.  You do not want to over-cook the asparagus because they will lose their beautiful green color.  You also still want them to have a good bite and not be flimsy.  I'd say, in this case, better to under-cook than over-cook.


Clean your fresh chives.  We picked these from our herb garden so they are super long.  You will need one chive per asparagus spear.


Combine your herb goat cheese and the 1/3 block cream cheese.  The cream cheese will help the goat cheese be easier to work with when spreading it on the pieces of ham.


Cut ham in half or thirds (we did thirds because our ham slices were very large).  Spread a very thin layer of goat cheese on each piece of ham.  Roll up asparagus in ham/goat cheese.  Tie with a chive to secure.  Place in a container to keep cool in the refrigerator.  Can be made a day in advance.


Remove from refrigerator just prior to serving.  Place on a serving tray.  I love using white because I think it makes the colors pop, but you can use whatever you'd like.


I would suggest discarding any un-eaten asparagus after the party if it has been sitting out for several hours.  These asparagus were eaten up SO quickly. I would recommend making more than you need and maybe bringing them out in two rounds so they don't spoil. 

Give this recipe a try - you're going to love it!

Sunday, February 13, 2011

Baked Breaded Zucchini


I have had a taste for fried zucchini over the last several days, so today I tried my hand a making a baked version of this popular appetizer and I must say it was mighty good!  To be honest, I could not tell the difference between this baked version and the fried version that you would purchase in a restaurant.  I breaded these zucchini chips with panko bread crumbs which I think really added to the crunchy texture.

If you have a taste for fried zucchini, give this healthier version a try.  This is great as an appetizer or a side-dish.  Your kiddos will love these too because, who doesn't love dipping things into ranch dressing or marinara sauce? YUM!

Baked Breaded Zucchini
Serves 4

Ingredients:
1 (1 lb.) bag frozen zucchini chips (or 1 fresh zucchini)
2 cups Japanese panko bread crumbs
1/2 cup Parmesan cheese
2 eggs, beaten
1 tsp. Italian seasoning
Olive oil cooking spray

Directions:
Preheat oven to 450 degrees.
For this recipe, I opted to use frozen zucchini since fresh zucchini is not in season.  The fresh was not on sale and can be kind of expensive this time of year.  Plus, the frozen version was already cut into circles!


Thaw frozen zucchini and allow the excess water to drain out.  If you are using fresh zucchini, you can omit this and the next step, just slice your zucchini into rounds.


You really want to make sure you get all of the excess water out of your zucchini so it becomes nice a crispy in the oven.  Place the rounds on a paper towel and place a second towel on top.  Press lightly to remove excess moisture.


Now it's time for the breading.  I love to use panko bread crumbs - I think they add a crunchy texture that can't be beat.  I use Trader Joe's brand, but you can pretty much find them in all your major grocery stores these days.  They are sold in the same section as regular bread crumbs.


In one bowl, mix your panko, Parmesan and Italian seasoning.  In another bowl, beat your two eggs.  I decided not to add any additional salt because I find the Parmesan adds enough, but if you like things a little saltier, then you might add a 1/4-1/2 teaspoon.

Next, coat your zucchini chips in the egg mixture and then dip in the panko mixture.  Coat thoroughly and add to a baking sheet that has been sprayed with olive oil spray or cooking spray.  If you run out of bread crumb mixture, that's ok, just make up a little more.


I love this olive oil spray from Trader Joe's.  If you can't find this, then a regular cooking spray will do the trick.


Once all of your zucchini chips are breaded, spray the tops with olive oil spray.  Place in oven for 6 minutes, then flip zucchini and bake for another 10 minutes.


Serve with ranch dressing (my personal favorite) or marinara sauce.  Enjoy!

Cottage Mama's Note:  This same technique can be used to make eggplant Parmesan. 

Tuesday, November 16, 2010

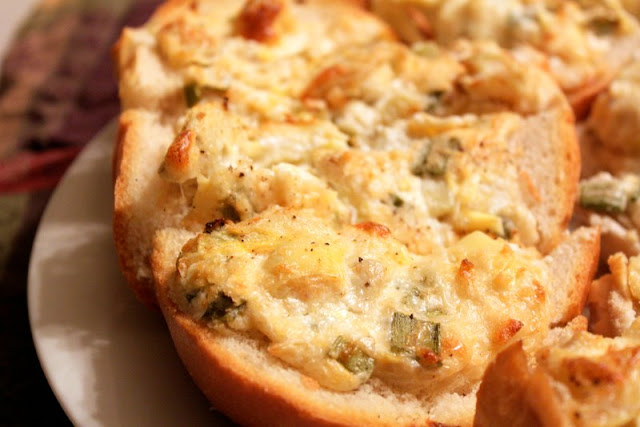
Baked Artichoke Bread


Every year my husband and I host a big fall party.  This was our sixth year hosting and we love being able to get all of our friends together and celebrate our favorite season.  We call the party "The Feast" and it is definitely just that.  We provide a large piece of meat for everyone - we've done barbecued turkey, pulled pork, tri-tip roast and this year we did a beef brisket.  My husband did a fabulous job with the brisket - maybe I can get him to "guest post" about it (wink, wink, hubby if you're reading this). 

Everyone else brings a dish to share and we have some pretty incredible cooks in our circle of friends.  There was jambalaya, white chicken chili, sweet and sour meatballs, homemade salsa and guacamole and tons of desserts - gorgeous fall leaf cookies, pumpkin pie, apple pie, sweet potato pie, chocolate dipped cheesecake and the list goes on and on. 

Even though we are in charge of the meat, I wanted to add a little something to the feast.  I had really been in the mood for some artichoke dip, so I thought that would be a good appetizer that everyone would enjoy.  I had planned to bake the dip in the oven and serve it with cut up pieces of Italian bread.  But as we were running a little short on time, I thought "why not bake the dip ON the bread?".  So that's how this recipe was born.........

Baked Artichoke Bread

Ingredients:
2 cans artichoke hearts in water
1 cup good mayonnaise
1 cup sour cream
1/2 cup Parmesan cheese (plus more for sprinkling)
4 green onions (sliced)
Salt and pepper, to taste
1-2 large loaves of Italian bread

Directions:
Preheat oven to 425 degrees.

Drain both cans of artichoke hearts and chopped them.  Mix chopped artichoke hearts, mayo, sour cream, Parmesan cheese, green onions, salt and pepper in a large mixing bowl.

Slice bread length-wise down the middle.  Place on a baking sheet.  Spread artichoke mixture all over the top of the bread.  Depending on your bread size, the mixture will cover 1-2 entire loaves.  Once mixture is spread on top of bread, sprinkle Parmesan cheese all over the top and a little freshly ground black pepper.


Place in oven and bake for 15-20 minutes or until the top is golden brown.  To serve, slice 1-2 inch thick slices.


Cottage Mama's Note:  This dish would be wonderful for holiday entertaining.  Serve it as an appetizer or as a hearty side-dish with your favorite soup.

Friday, August 27, 2010

Change Up Bag Lunches with Tortilla Roll-ups


My Mom always did a great job packing our lunches while we were in school.  And yes, I was one of those kids whose Mom packed their lunch up until their very last day of high school - thanks Mom!

As most kids do, I went through phases of liking certain things more than others.  Only wanting turkey sandwiches with nothing but turkey and bread (how boring!) and loving peanut butter and jelly (minus the jelly).  But I always got excited when my Mom would change it up a bit with something new and Tortilla Roll-ups were definitely a pleasant surprise.

Now while I don't have school aged children yet, we had a playdate this week with a good friend and her little ones, so I decided to whip up some of these roll-ups for the occasion.


This is my grown up version of Tortilla Roll-ups (with lots of yummy things inside), but my girls love them, so your kiddos probably will too!

Tortilla Roll-ups
Serves 3 (big kids) - 6 (little kids)
Ingredients:
1 block cream cheese
1 can diced green chiles
1 small can sliced black olives
1 tablespoon fresh chives (or one green onion, sliced)
6 slices of ham
6 flour tortillas


Directions:
Set cream cheese out on kitchen counter for 30 mins. or so to allow it to soften.  Meanwhile, drain black olives and give them a rough chop.  Slice green onions or chop chives (both are tasty so use what you like best).  Place green onions (or chives), roughly chopped black olives, and canned green chiles into a large mixing bowl.  Stir to combine.

Add your cream cheese to the green onion, olive and green chile mixture.  Work the cream cheese into the mixture with a wooden spoon.  Mix until the cream cheese is completely combined.

Now for the roll-ups.  Using a spatula, spread 1/6th of the mixture evenly on top of a flour tortilla and place a piece of ham on top.  Roll up your tortilla.


Pack two tortilla roll-ups (or one for an elementary age student) for lunch by wrapping them in plastic wrap.


If your little ones (or bigger teen ones) prefer little finger foods, slice tortillas and pack in a small tupperware container. 


The sliced version make a wonderful appetizer or a finger food dish to bring to a party.


And hey, grown-ups love these things to, so even if you don't have kids, make some of these for yourself for lunch - you will love them - deeeelish!

Cottage Mama's Note:  If your children prefer are more simplistic recipe, just make these with plain cream cheese and ham.  It will still be something different than their regular sandwich.

Friday, March 12, 2010

Easiest Appetizer EVER - Cream Cheese & Olive Crescents

This recipe is so easy, it's almost embarrassing........I don't even know if I should call it a recipe.

Yesterday I wanted to make something super yummy for my daughter and I for lunch (my 2-year old loves olives).  I was kind of in a comfort food sort of mood (what's new, right?) and this is what I came up with and boy was it good!!


Cream Cheese & Olive Crescents

Ingredients:
1/2 brick cream cheese
Marinated olives, chopped - I used an olive muffaleta spread, but olive tapenade would work well
1 package crescent rolls

Directions:


Cottage Mama's Note:  What do you think of my little tutorial?  Like the text on the pictures?

Monday, January 4, 2010

Homemade Soft Pretzels with Honey Mustard Sauce


My husband, Brett, is a homebrewer - I don't know if I have mentioned that on the blog yet.  Brett makes his own beer and wine in the cottage basement, which is not much of a basement, more like the cottage dungeon.  And though I know I am probably bias, his beer is some of the best I have ever tasted.  Since yeast is a major component in the brewing process my hubby is very familiar with its workings.  So recently he has taken an interest in other things involving yeast such as baking bread.

Do you know what goes really well with beer?  Soft pretzels!!  This is my husband's recipe for Soft Pretzels with Honey Mustard Sauce that comes to you via Draft Magazine.  These pretzels are SO awesome!!  He made them on New Year's Eve and we gobbled them up so fast that they disappeared before our eyes.

Soft Pretzels with Honey Mustard Sauce
Makes 15-20 small-sized pretzels
Soft Pretzels:
1 package of active dry yeast
5 cups flour
1 1/3 cups warm water
1/8 cup warm water
1/3 cup brown sugar
Water, baking soda
Sea Salt

Honey Mustard Dip:
5 ounces creme fraiche (or sour cream)
3 tablespoons honey
2 tablespoons dijon or german mustard
Salt and sugar to taste

Directions:
  • Dissolve yeast in 1/8 cup warm water.
  • Stir in 1 1/3 cups warm water, brown sugar and flour.  Beat until smooth.
  • Knead dough until smooth and elastic.
  • Heat oven to 475 degrees.
  • In a saucepan, add 2 tablespoons baking soda to each cup of water.  Use enough to fill the saucepan; bring to a boil.
  • Tear off some dough and roll a pencil shape with your hands.  Pick up both ends, cross to form rabbit ears and then twist the ends and pull the back to the rest of the loop (making a pretzel shape).
  • Place twisted pretzels in water/baking soda mixture for 15 seconds until pretzel dough is golden or yellow in color.  Remove pretzels from boiling water and place onto cookie sheet.  Sprinkle tops with sea salt.  
  • Bake 8 to 10 minutes or until pretzels are golden brown (see picture above).
Honey Mustard Dip
  • Stir creme fraiche (or sour cream), honey and mustard until creamy.
  • Add sugar and salt to taste.

Pretzels Ready to Eat

Cottage Mama's Note:  Make sure to enjoy your soft pretzels with your favorite craft beer!

Saturday, December 26, 2009

Olive Cheese Bread

I feel the need to shout this from the roof-top - I LOVE OLIVE CHEESE BREAD!  This recipe is out of my Pioneer Woman Cooks cookbook that I got about a month or so ago.  I've been dying to try this recipe and I decided Christmas Eve would be the perfect opportunity.  And, oh my gosh, was it good!

Now this is definitely not a figure-friendly recipe, but when you are looking to indulge a little bit (such as around the holidays), you cannot go wrong with this bread.  I served this with our Christmas Eve meal - we had a barbequed turkey, potatoes gratin, cornbread stuffing with bacon, and sauteed garlic spinach.  In retrospect, the bread would probably be better served as an appetizer or a meal by itself as it is so filling, but I am in love and so is everyone else who tried it.

I apologize in advance - I do not have a picture of my completed bread.  I wasn't a hundred percent sure it would be "blog-worthy" (as my husband and I say) so I didn't snap a shot.  And then before I knew it - poof -  the bread was gone.  That's the magic of this recipe - it is so delicious that you will blink and it will disappear!

So here is the Olive Cheese Bread recipe from The Pioneer Woman Cooks :

Olive Cheese Bread
Ingredients:
One 14.5 ounce can black olives, drained
One 6 ounce jar pimento-stuffed green olives, drained
2 green onions
1/4 pound (1 stick) of butter, softened
1/2 cup mayo (real mayo, no substitution)
1 pound Monterey Jack cheese, grated
1 loaf crusty French bread

Directions:
1.  Preheat the oven to 325 degrees.
2.  Roughly chop black olives.
3.  Roughly chop green olives.
4.  Slice green onions, then roughly chop.
5.  In a large bowl, combine the butter, mayo, cheese, olives and green onions.
6.  Stir until thoroughly combined.
7.  Slice French bread in half, lengthwise.
8.  Spread the olive-cheese mixture in an even layer on each half.
9.  Bake for 20-25 minutes until the cheese mixture is thoroughly melted and beginning to turn light brown and bubbly.  Cut into diagonal slices and serve immediately.

Cottage Mama's Note:  The Pioneer Woman says you can make this bread a head of time and freeze it for up to 6 months.  Also trying substituting other ingredients for the olives and Monterey Jack - for example, chopped sun-dried tomatoes and mozzarella or artichoke hearts and parmesan.


The Pioneer Woman Cooks is an amazing cookbook with beautiful photography and a wonderful story.  If you like good southwestern, southern comfort food, you must check it out.  It is available on Amazon  right now for only $11.50 (regularly $27.50)!

Thursday, December 10, 2009

Goat Cheese Pizza

Last night I made the easiest pizza ever!  I love Trader Joe's and they have pre-made balls of pizza dough that you can buy and take home to make whatever you want: pizza, calzone, stromboli, ect.  So here's what I came up with.  There are very few ingredients, but sometimes the simpler the better!

Goat Cheese Pizza
Ingredients:
-1 ball pizza dough (or make your own favorite recipe)
-1 cup marinara sauce (I used Trader Joe's Tomato Basil)
-4 oz crumbled goat cheese
-1 cup shredded mozzarella cheese
-1/2 cup parmesan cheese
-1 small onion (thinly sliced)
-1/2 teaspoon dried oregano
-1/2 teaspoon red pepper flakes

Directions:
Preheat oven to 350 degrees.  Roll out pizza dough on floured surface into your desired shape.  Top with marinara, followed by mozzarella, onion and goat cheese.  Sprinkle parmesan, oregano & red pepper flakes on top.

Bake for 15 minutes (or according to your pizza dough recipe).  Enjoy!!

Cottage Mama's Note:  My husband loves to have this pizza with Frank's Hot Sauce, so if you have someone in your life that likes it hot, serve it up with Frank's.  This pizza would also be great with spinach if you are trying to get some extra green into your family.

Sunday, November 29, 2009

Holiday Chex Mix


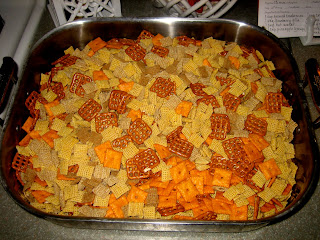
Today my family decorated our lovely Christmas tree that we cut down yesterday.  We turned on our holiday music, got out the family ornaments, and I made up a homemade batch of chex mix!  I love chex mix.  If you've never had it and you are thinking that it is just liked the stuff you get in the bag, you are sorely mistaken.  It is SO much better!  I look forward to chex mix every holiday season.  I know I could probably make it other times of the year, but it has become a tradition that I make our chex mix while we decorate our tree.  Please, please, please give this a try - you will love it!!  


Here's the recipe for homemade chex mix (it's usually right on the side of the box, but in case you threw out your box :-):


Chex Mix

3cups Corn Chex® cereal
3cups Rice Chex® cereal
3cups Wheat Chex® cereal
1cup mixed nuts
1cup bite-size pretzels
1cup garlic-flavor bite-size bagel chips or regular-size bagel chips, broken into 1-inch pieces
6tablespoons butter or margarine
2tablespoons Worcestershire sauce
1 1/2teaspoons seasoned salt
3/4teaspoon garlic powder
1/2teaspoon onion powder


Directions:  Heat oven to 250°F. In large bowl, mix cereals, nuts, pretzels and bagel chips; set aside. In ungreased large roasting pan, melt butter in oven. Stir in seasonings. Gradually stir in cereal mixture until evenly coated. 

Bake 1 hour, stirring every 15 minutes. 

Spread on paper towels to cool, about 15 minutes. 

Store in airtight container. Enjoy!!


Cottage Mama's Note:  I prefer to use cheez-its instead of bagel chips and I also like to use cashews instead of mixed nuts.  I also triple the recipe because like I said, I LOVE chex mix!

Monday, October 12, 2009

Lindsay's "Romantic" Cheese Fondue


The evening seems to bring craziness around our house, especially with having a 19-month old and a 3-month old.  We have dinner, bath-time, and bed-time routines to attend to that keep us on our toes.  Sometimes it's hard for my husband and I to find the time to really connect with one another; though I know it is so important for us to do so.  Usually we find time to chat over dinner, after our little ones are in bed, but so often this is done with us watching our favorite television program and we don't truly look into one another's eyes and connect on a daily basis.

My "Romantic" Cheese Fondue is a wonderful meal to cook for your significant other when you really want to sit down at the dining room table and reconnect with the one you love.  It allows you to linger over dinner and really interact with one another.  Give the recipe a try, open up a good bottle of wine and I'll bet you'll feel the romance!


Lindsay’s “Romantic” Cheese Fondue
(Makes 2-3 cups fondue, serves 4-6)

Ingredients:
½ lb. medium-sharp cheddar cheese, grated                                   
1 Tbsp. cornstarch
½ lb. Emmanthaler Swiss cheese, grated                                   
¼ cup dry white wine
2 sliced scallions (white & green parts)                                   
2 cloves garlic, minced
Pinch of ground nutmeg           
1 Tbsp. Olive oil

Heat a 3-quart sauce pan to medium heat.  Add olive oil and then garlic. Sauté garlic until cooked through, but not brown. Add ¼ cup dry white wine to the pot.  Bring to a simmer over medium heat.

Meanwhile, toss grated cheddar and Swiss cheese with 1 Tbsp. cornstarch to coat.  Add cheese to the pot along with a pinch of ground nutmeg.  Cook, stirring with a wooden spoon until the cheese is melted and smooth.  Before transferring into the fondue pot add sliced scallions and season with salt and pepper to taste.  

To serve, transfer to fondue pot over a flame.

Serving Suggestions: Serve with cubes of bread, grilled shrimp, sliced sausages, cubed chicken, roasted mushrooms, sliced zucchini or summer squash, steamed asparagus, boiled or roasted potatoes, sliced apples and grapes.

Cook’s Note:
  • I prefer to use white cheddar cheese to ensure a unified color.
  • If the fondue is too thick, add up to an additional ¼ cup of white wine.