Showing posts with label Craft Tutorial. Show all posts

Wednesday, August 3, 2011

Crepe Paper Flowers


The crepe paper flowers that I made for Matilda's "Tea for 2" party were really simple to make and incredibly inexpensive.  I bought three rolls of different colored crepe paper and was able to make about 10 different flowers and a ton of ruffled streamers (and I still had some left over).  At $1.00 per roll, I would definitely say this was budget decorating.

Here's how to make your own crepe paper flowers........

Supplies:
3 rolls crepe paper (different colors)
Tape
Sewing machine

Directions: 


Grab your three rolls of crepe paper.   I chose two different shades of pink and yellow.  I purchased these at Walmart for $1.00 per roll and they coordinated with the napkins and plates as well.


Place your three different colored crepe papers on top of one another.


Set your sewing machine to the longest stitch length (mine is 5.0) and run a straight, gathering stitch along one of the edges of your crepe paper.  Do not back-stitch at the beginning or the end of your stitching or you will not be able to gather your crepe paper.

The length of crepe paper you cut is really up to you.  The longer the crepe paper length, the larger your flowers will be.  I used many different lengths for a variety of sizes, but you could do them all uniformly as well.  You might test one out first to see how long you want your crepe paper.


Pull one of the threads and begin to gather your crepe paper.  This will take a little effort, but keep pulling and sliding the gathers until you have successfully gathered the entire length of your crepe paper.


Here is what your crepe paper will look like after gathering.  You can see that it already starts to form the shape of a flower.


Work your crepe paper around in a circle and tape the back with clear tape to secure in place.


Above is your crepe paper flower before you fluff it out.  To fluff it, just seperate each layer of crepe paper from the other until you've achieved your desired look.


And when you have successfully fluffed your flower, you will have a gorgeous, full-looking crepe paper flower to use for your next party.  Try making these in a variety of colors and sizes to coordinate with any party theme.  These would also be really great for a baby or bridal shower as well!

Tuesday, April 5, 2011

Spring Issue Delish Magazine - DIY Fabric Covered Photo Mats


The new spring issue of Delish Magazine was just released this afternoon!  In case you aren't familiar, Delish is a free online women's magazine filled with tons of great information, tips, articles, recipes, ect.  In this quarters issue I am sharing an easy tutorial for Fabric Covered Photo Mats.


There are lots of fun, interesting articles in the spring issue, including some fabulous recipes and a great interview with fabric designer, Kate Spain.  Head over to Delish and check it out!


Monday, March 28, 2011

Burlap Covered Lamp Shade Tutorial


I'm definitely in full-on nesting mode now and have been tackling all sorts of home improvement projects. I have been working on bringing more texture into our home lately.  While I love bright, fresh fabrics for little girls clothing, I much prefer a warm, earthy palette for my home decor.

I love looking through the Potterybarn and Ballard Designs catelogues for ideas and inspiration.  Both of these stores are a little out of my budget these days, but I think they do such a wonderful job of putting rooms together with color, texture and natural elements.

 image via Ballard Designs

I have been eying these burlap covered lamp shades in the Ballard Designs catelogue lately, but at $35 - $50 per shade, I just can't justify the splurge.  So what is a girl to do?  How about a DIY version for only $1.50 per shade?  Now, that's more like it!

 Burlap Covered Lamp Shade Tutorial

Materials:
1 solid color lamp shade (any size)
1-2 yards burlap (more yardage for bigger shades)
Spray adhesive
Heat n' Bond
Glue gun
Iron
Clothes pins
Scissors

Directions:


Grab your lamp shade.  This was an IKEA shade that I've had for quite some time.  I covered two of these and one much larger shade.  I like the shape of this shade, but I never loved the fact that the light looked so white coming through it.  I knew the burlap would help fix that problem and warm it right up.

Make sure you choose a solid color shade.  Any patterns will show through the burlap and the shade will lose it's earthy look.

I purchased my burlap at my local Joann's.  It was $3.99 per yard, but I had a 50% off coupon, plus an additional 25% off coupon - got love coupons for fabric!


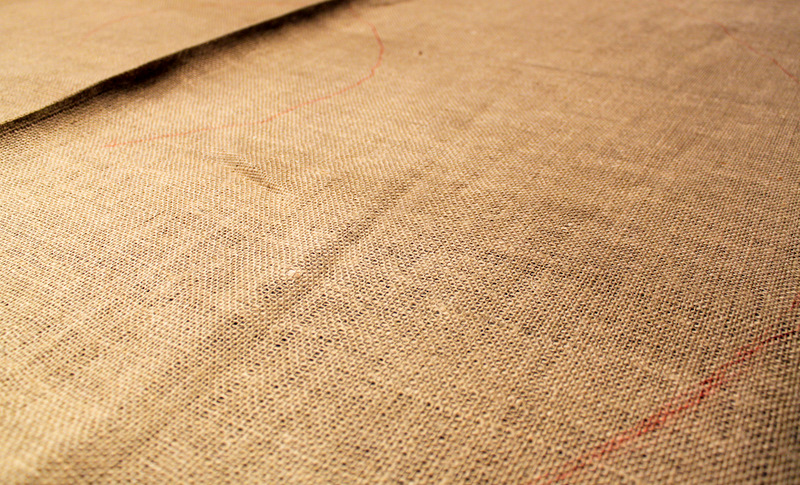
Turn your lamp shade on its side and trace it (by rolling it along your burlap).  Leave an inch or two allowance on the top and bottom.  It's hard to see my markings in the picture above, but I just used a pink highlighter.


Cut out your pattern.  Most angled shades will look like the shape above.  If you are using a drum shade (meaning round), you will have a less curved pattern.


Spray your entire lamp shade with spray adhesive.  Do this outside since the fumes can be a little overwhelming.  You can find spray adhesive in most craft stores and hardware stores.  Wrap your burlap around the shade, smoothing all the bumps as you go.


Cut off any excess burlap from the top and the bottom of the shade.  The burlap should not extend past the top or bottom of the shade.


Now to make the finished edge or binding.  Measure around the top and the bottom of the shade.  You will want a long enough length of burlap to cover these two measurements plus and extra inch or so.  Cut the burlap 2 inches wide.  Grab your Heat n Bond for the next step.


Iron the Heat n Bond (paper side up) down the middle of your long burlap strip.  Once it has cooled remove the paper backing.


Next you will fold in both sides and press.  This will secure the two raw edges of the burlap.  Do this all the way down the entire strip.


Heat up your glue gun.  Turn the outside raw edge of the burlap under and glue in place down the back of the shade.


Take the binding and hot glue it to the top and bottom of the shade.  This will hide any raw edges.  Trim any excess burlap that might be poking above or below the binding.


I used clothes pins to hold the binding in place.  Because of the angled shape of this shade I really had to work to get the binding to lay flat since I did not cut it on the bias.  This step will be a lot easier with a round drum shade.  The clothes pins really helped me here, so I highly recommend using them during this step.  Once the glue has cooled, remove clothes pins.


When your lamp shade is complete, place it on your lamp base and enjoy this beautiful, natural look!  This lamp base is also one I have had for many years from IKEA.


I considered using bias tape for binding the top and the bottom of the lamp shade.  You certainly could give that a try if you want to skip the step of making your own burlap binding.  I think brown, cream or natural would look really nice.  Or if you are feeling a little wild try blue, green or red.


Here's the extra-large shade that I covered for the lamp in our playroom.  This shade was a hand-me-down and had a little hole in it that drove me nuts.  But the size was so wonderful, that I couldn't bare to part with it.  With the burlap on the shade, you would never know it ever had a hole.

Three lamp shades for a total of $4.00 - sure beats three shades for $105 - $150, don't you think?  Granted they would be a little more if you don't have all the supplies (I only had to buy the burlap), but still, I think it was well-worth taking the time for a little DIY!

Thursday, January 6, 2011

Vintage Inspired Craft Room Organization


My mother-in-law has a great art studio in her home.  It is large, gets lots of natural light and she has so many neat supplies such as buttons, vintage linens, lace, fabrics, glitter, glues, pens, paints and the list goes on and on.

For this past Christmas I wanted to make her a few things for her studio.  Most of these items were for storing her large collection of different trinkets that she uses on her Art Dolls.  I found these great vintage labels HERE and had fun turning these into pretty organizational supplies.

With the new year upon us, I bet a lot of us are in an organizational mood, so why not make it fun with vintage inspired craft room organization!?!


I made my mother-in-law a canvas sign for her craft room.  My girls call her "GiGi" which stands for Grandma Glitter.  My mother-in-law has a serious thing for all things glittery!

I painted the canvas a bone-white.  Then I altered this (click here) graphic to customize it with her information using Picasa.  I fit the image to page, printed it on my home computer, cut it out and mod podged it to the canvas.


These are store-bought heavy cardboard boxes that I found at Joann's.  I mod podged the circle graphics to the top and then mod podged a blank label on the side.  I chose to leave the label blank so she can label them as she wishes.  Click here to get the free graphics.


These are some fun apothecary jars that I simply mod podged labels onto as well.  I thought she could use these to display some of her most treasured buttons.  Click here to get the free graphics.


So here's Gigi's craft room organization set.  I think she really liked it and I can't wait to see that sign hanging in her studio.  Happy organizing!

Monday, January 3, 2011

Tile Coaster Tutorial


There's nothing better than a handmade gift.  And what better way to celebrate than with some fun, festive coasters.  These coasters are made from inexpensive tiles from the hardware store and are embellished with fun, designer scrapbook paper.

Make these coasters as a gift or make them for your home - either way, they are sure to get noticed!

Supplies:
4 square tiles from your local hardware store (4.25" x 4.25")
4 pieces of scrapbook paper (3.75" x 3.75")
4 pieces of felt (3.75" x 3.75")
Mod Podge
Sponge brush
Glue (i.e. Fabri-tac or other strong adhesive)
Clear acrylic sealer


1.  Gather your supplies.

2.  Brush one coat of Mod Podge onto tile.

3. Place one piece of paper on center of tile.  Allow to dry.

4. Brush on another coat of mod podge on top of paper.  Allow to dry 15 minutes and repeat 2-3 more times.

5.  After mod podge is dry, take tiles outside and spray with clear acrylic sealer.  Follow manufacturers instructions.  The sealer makes these tile coasters water-resistant.

6.  Allow coasters to dry completely.  Once dry, glue felt squares to the bottom center of the tile.


Wrap four of these coasters up with some beautiful ribbon and you've got a gorgeous handmade gift. 


And finally, grab yourself a cocktail and toast to a wonderful New Year!